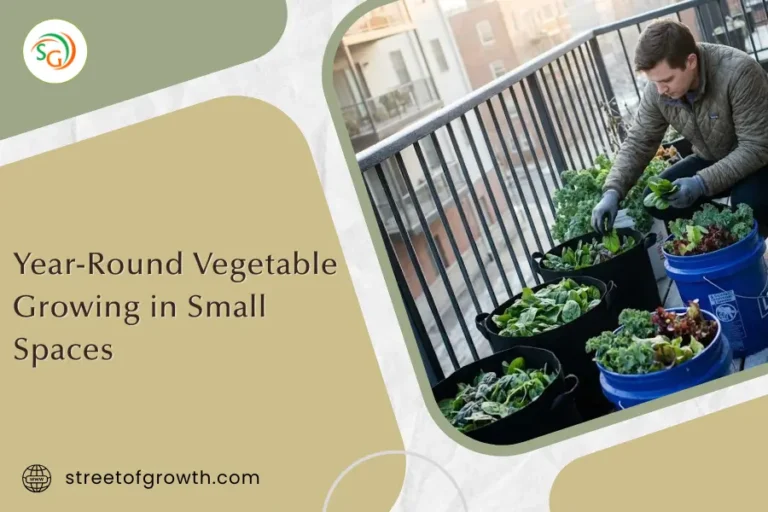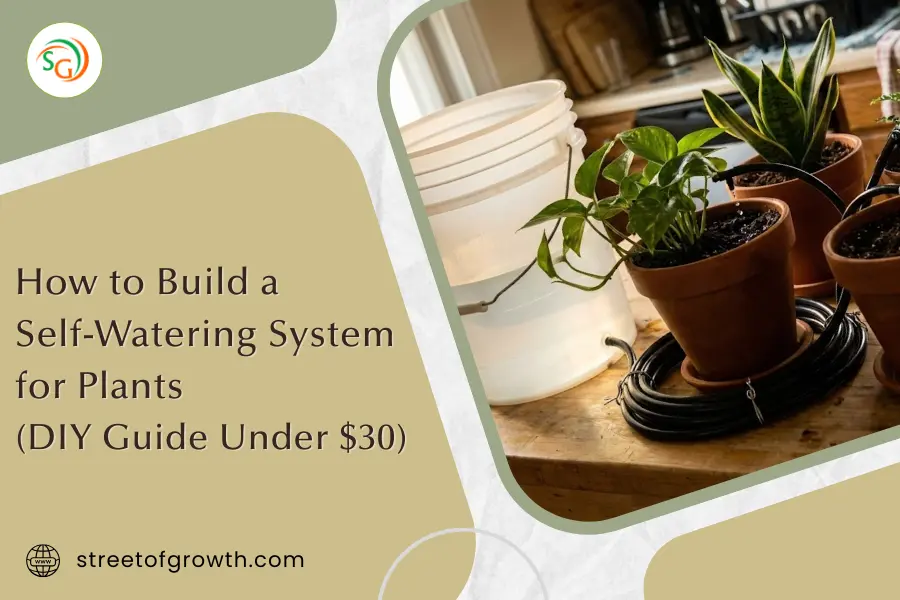
How to Build a Self-Watering System for Plants (DIY Guide Under $30)
Imagine coming home from a two-week vacation to find your plants thriving instead of wilted. No more begging neighbors to water your garden. No more guilt about traveling. A self-watering system makes this dream a reality, and you can build one yourself for a fraction of the cost of commercial products.
This guide will walk you through everything you need to know about creating your own plant watering system that runs on its own. Whether you have 5 houseplants or 20, whether you’re a complete beginner or an experienced DIYer, you’ll find a solution that fits your needs and budget.
Why Automatic Watering Beats Manual Watering
Manual watering has serious drawbacks. You might water too much one day and forget the next. When you travel, your plants suffer. Even asking someone to water them rarely works out perfectly because they don’t know each plant’s specific needs.
Self-running systems solve all these problems. They deliver consistent amounts of water at precisely the right times. Your plants get exactly what they need, when they need it. Studies show that plants watered by automatic systems grow 30% faster and healthier because they never experience drought stress or overwatering.
The best part? You don’t need to spend $100 on a fancy commercial system. With basic materials from your local hardware store, you can build a self-watering system for $15 to $80, depending on how far you want to take it.
Understanding How Self-Watering Systems Work
Before we start building, let’s understand the three main components every automatic system needs:
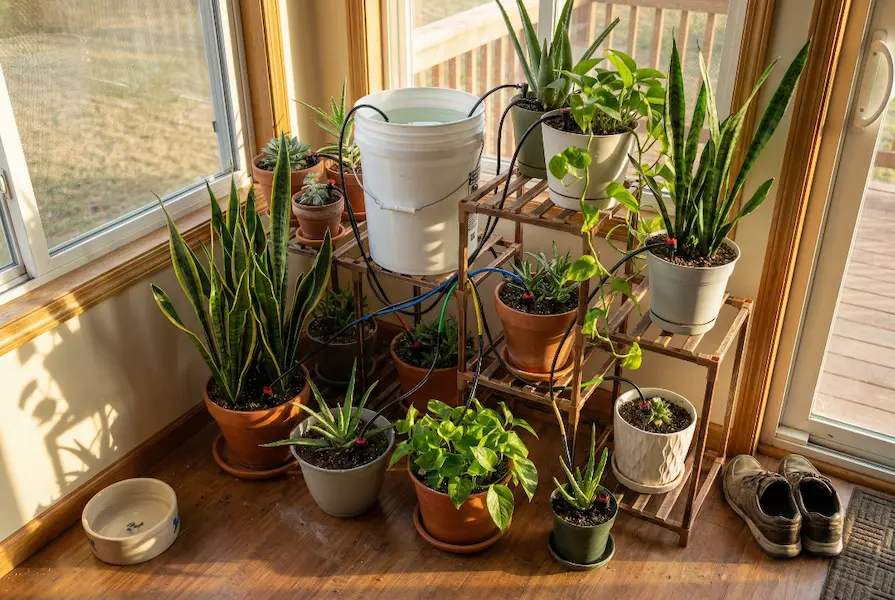
Water Source: This can be a bucket, reservoir, or even your garden hose. The key is having enough water to last between refills. For indoor systems, a 5-gallon bucket typically lasts 1-2 weeks for 10 plants.
Delivery Method: Water moves from the source to your plants through tubing and drippers. Gravity-fed systems are simplest but less precise. Pump-based systems give you complete control over flow rate and timing.
Control Mechanism: This is what makes your system truly automatic. It can be a simple mechanical timer, a digital programmable controller, or even a moisture sensor that waters plants only when the soil gets dry.
The magic happens when these three components work together. The controller activates the delivery method at scheduled times, pulling water from the source and distributing it to your plants through individualized drippers.
Choosing the Right System for Your Needs
Not all self-watering systems are created equal. Here’s a comparison of different types to help you decide:
| System Type | Best For | Cost Range | Complexity | Water Precision | Pros | Cons |
|---|---|---|---|---|---|---|
| Basic Timer + Gravity | 1-5 plants, short trips | $15-25 | Very Easy | Medium | Cheap, no electricity needed | Limited control, requires elevated reservoir |
| Timer + Pump | 5-15 plants, frequent travel | $30-50 | Easy | High | Precise timing, works anywhere | Needs power source |
| Moisture Sensor + Pump | 5-20 plants, variable climates | $50-80 | Moderate | Very High | Waters only when needed, prevents overwatering | More setup, requires calibration |
| WiFi Smart Controller | 10+ plants, tech enthusiasts | $80-150 | Moderate-Hard | Very High | Control from phone, weather integration | Expensive, requires WiFi |
For most people, the Timer + Pump system offers the best balance of cost, ease, and effectiveness. That’s what we’ll focus on in this guide, but I’ll also show you how to upgrade to moisture sensors.
DIY Build: Basic Timer System (Under $30)
This system is perfect for beginners. It uses an outlet timer and a small submersible pump to water your plants on a fixed schedule.
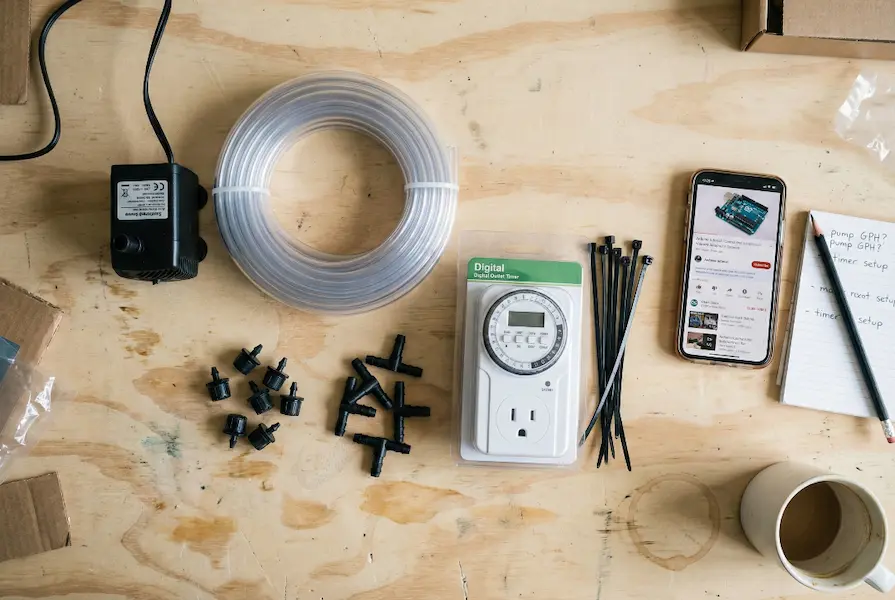
Materials You’ll Need
- 12V DC submersible water pump (400-600 L/H capacity): $8-12
- Digital outlet timer: $10-15
- 12V power adapter: $6-8
- 1/4 inch vinyl tubing (25 feet): $8-12
- Adjustable drippers or drip stakes (pack of 10): $8-12
- 5-gallon bucket with lid: $5-8
- T-connectors and end caps: $5-8
- Zip ties or tube clips: $3-5
Total Cost: $25-35
Step-by-Step Assembly
Step 1: Prepare Your Reservoir
Take your 5-gallon bucket and drill a small hole in the lid, just large enough to feed the power cable through. This keeps debris out while allowing the pump cable to exit. Clean the bucket thoroughly, especially if it previously held chemicals.
Place the submersible pump at the bottom of the bucket. These pumps are designed to sit underwater, so full submersion is fine. The intake should face away from the bucket sides to prevent suction issues.
Step 2: Set Up the Distribution Lines
Cut your vinyl tubing into a main line that runs from the pump to your plant area. From this main line, create individual branch lines to each plant using T-connectors. Each branch should be 12-18 inches long to give you flexibility in plant placement.
At the end of each branch line, attach an adjustable dripper. These small devices control how much water each plant receives. Start with them halfway open, then adjust based on plant size and water needs.
Step 3: Connect the Electronics
Plug your 12V power adapter into the outlet timer. Connect the adapter to your pump. The timer is your control center. Most digital timers let you set multiple watering sessions per day.
For most indoor plants, two watering sessions work well: one in early morning (7 AM) and one in early evening (6 PM). Each session should run for 2-5 minutes, depending on your pump’s flow rate and plant needs.
Step 4: Test and Adjust
Fill your bucket with water. Set your timer to run immediately so you can observe the system. Check each dripper to make sure water flows properly. Look for leaks at all connection points.
Adjust the drippers so larger plants get more water and smaller plants get less. A good rule of thumb: succulents need the slowest drip, tropical plants need medium flow, and vegetables need the fastest flow.
Pro Tips for Success
Place your bucket on a small stand or crate. This elevates it slightly above floor level, which helps with pump efficiency and makes refilling easier.
Use a permanent marker to draw a “fill line” on your bucket at the 4-gallon mark. This gives you a visual reminder to refill before the water runs completely out.
Keep a log for the first week. Note when you refill the bucket and how much water you add. This tells you exactly how long your system lasts, so you can plan refills around your schedule.
Upgrading to Moisture Sensor Control
Once you’ve gotten comfortable with the basic timer system, you might want to upgrade to moisture sensor control. This setup waters your plants only when the soil actually needs it, adapting to changing weather and seasons automatically.
Additional Materials Needed
- Capacitive soil moisture sensors (pack of 5): $15-20
- Arduino Uno or ESP8266 microcontroller: $10-25
- Relay module (4-channel): $8-12
- Breadboard and jumper wires: $8-10
- USB power supply for microcontroller: $6-8
Additional Cost: $47-75
How Moisture Sensor Systems Work
Soil moisture sensors measure the water content in your potting mix by detecting electrical conductivity. Dry soil has low conductivity, while wet soil has high conductivity. The sensor sends this data to your microcontroller (the brain of your system).
You program the microcontroller with threshold values. When the sensor reads that soil moisture has dropped below your set point, the microcontroller activates the relay, which turns on the pump. Water flows until the moisture reaches your upper threshold, then the system shuts off.
This is far more efficient than timed watering because it responds to actual plant needs. During hot, dry weeks, your plants might need water daily. During cool, humid periods, they might go three days between waterings. The moisture sensor adjusts automatically.
Watch this step-by-step video tutorial to see exactly how the basic system works:
Basic Setup Instructions
Insert one moisture sensor into each pot, positioning it halfway between the plant stem and the pot edge, about 2-3 inches deep. This gives you accurate readings of the root zone moisture.
Connect the sensors to your microcontroller according to the wiring diagram. For detailed visual guides with pictures showing exact pin connections, check out this Arduino soil moisture sensor tutorial. Each sensor needs three wires: power, ground, and signal.
The relay module connects between your microcontroller and your pump. When the microcontroller detects dry soil, it sends a signal to the relay, which acts like an automatic switch to turn the pump on and off.
Programming Your Controller
You can find free Arduino code for moisture-based watering systems on GitHub. Search for “Arduino plant watering moisture sensor” and you’ll find dozens of pre-written programs you can modify for your needs. The Arduino Project Hub has several complete moisture sensor projects with working code you can download and customize for your setup.
The basic code includes these elements:
- Read moisture values from all sensors every 30 minutes
- Compare each reading to your threshold (typically 30-40% moisture)
- If any reading is below threshold, activate pump for that zone
- Water for 30 seconds, then check moisture again
- Continue until moisture reaches 60-70%
- Log all watering events with timestamps
Start with conservative thresholds (water when moisture drops to 35%) and adjust based on your plants’ response. You want soil that’s consistently moist but never soggy.
Building a Multi-Plant System (15-20 Plants)
If you’re caring for many plants, you need a more heavy-duty system. This setup uses zone control to manage different plant types with varying water needs.
Materials for Large-Scale System
- 12V DC water pump (800-1000 L/H): $15-25
- 4-channel relay module: $8-12
- Four separate water lines (one per zone): $20-30
- 50 feet of 1/4 inch tubing total: $15-20
- 20 adjustable drippers: $15-20
- Digital 7-day timer with multiple programs: $15-20
- 10-gallon reservoir: $12-15
Total Cost: $100-162
Zone Planning Strategy
Divide your plants into four zones based on water needs:
Zone 1: High-Water Plants (vegetables, ferns, tropical plants) Zone 2: Medium-Water Plants (most houseplants, herbs) Zone 3: Low-Water Plants (succulents, cacti, snake plants) Zone 4: Seasonal or Outdoor Plants
Each zone gets its own relay-controlled water line. You can program different watering schedules for each zone. High-water plants might run twice daily for 5 minutes each. Succulents might run once every three days for just 2 minutes.
Assembly Process
Your main pump sits in the reservoir as before. But instead of one output line, you split the pump output into four lines using a manifold (a four-way splitter valve). Each line connects to one channel on your relay module.
The relay module acts as four separate switches. Your timer or microcontroller tells each relay when to open and close, controlling water flow to each zone independently.
Run each zone’s main line to its designated plant group. From each main line, create individual branches to each plant using T-connectors, just like in the basic system.
Extra Features to Consider
Add a float switch to your reservoir. This safety device detects when water level gets too low and prevents your pump from running dry, which can burn out the motor.
Install inline filters before each zone’s drippers. These small mesh filters (under $2 each) prevent debris from clogging your drippers, especially important if you use garden water or fertilizer solutions.
Use color-coded tubing for each zone. Blue for high-water, green for medium, yellow for low-water, and red for seasonal. This makes troubleshooting and adjustments much easier.
Troubleshooting Common Problems
Even well-built systems occasionally have issues. Here’s how to fix the most common problems:
Problem: Pump Won’t Turn On
Check that your timer is actually triggering. Plug a lamp into the timer to verify it’s switching on and off correctly. If the timer works but the pump doesn’t, check all electrical connections. Make sure the power adapter matches your pump’s voltage requirements (usually 12V DC).
Test the pump directly by connecting it to power without the timer. If it runs, your timer or relay is the problem. If it doesn’t run, the pump may need replacement.
Problem: Uneven Water Distribution
This usually happens when some drippers clog or when tubing develops air pockets. Remove and clean each dripper in warm water. For stubborn clogs, soak drippers in white vinegar for 30 minutes.
Check that all tubing runs are roughly the same length. Water takes the path of least resistance, so plants on shorter runs get more water. Add inline adjustable valves to longer runs to balance flow rates.
Problem: System Uses Too Much/Too Little Water
If your bucket empties too fast, reduce either watering frequency or duration. Cut each watering session by one minute and observe results for three days. Keep adjusting until you find the sweet spot.
If plants show signs of underwatering (wilting, dry soil), increase duration first before adding more frequent sessions. It’s better to water deeply less often than to water lightly more often.
Problem: Moisture Sensors Give False Readings
Capacitive sensors can drift over time, especially in high-humidity environments. Recalibrate by testing each sensor in completely dry soil, then in a glass of water. Record both values and update your code’s threshold accordingly.
Make sure sensors aren’t touching the pot sides or other conductive materials. Position them in the soil only, away from fertilizer pellets or metal stakes.
Problem: Leaks at Connections
Vinyl tubing can work loose over time, especially if exposed to temperature changes. Push each connection firmly back together. For permanent fixes, use tubing cement (available at hardware stores) or replace compression fittings that may be worn out.
Inspect tubing for cracks or splits, especially near connector points where stress is highest. Replace damaged sections rather than trying to patch them.
System Maintenance and Best Practices
Self-watering systems need regular maintenance to run smoothly. Here’s your maintenance schedule:
Weekly Tasks
Check water level in your reservoir and refill as needed. Even if your system can last two weeks, checking weekly prevents surprises.
Observe each plant briefly. Look for signs of overwatering (yellow leaves, soggy soil) or underwatering (drooping, dry soil). Adjust individual drippers as needed.
Monthly Tasks
Clean your reservoir completely. Empty any remaining water, scrub sides with diluted bleach solution (1 tablespoon bleach per gallon of water), rinse thoroughly, and refill with fresh water.
Inspect all tubing connections for leaks or looseness. Tighten or replace as needed.
Remove and clean all drippers. Soak in white vinegar if you notice mineral buildup (white crusty deposits).
Quarterly Tasks
Test your timer or controller battery backup if it has one. Replace batteries before they run completely dead.
Check pump performance. If flow rate seems lower than normal, clean the pump intake screen or replace the pump if it’s worn out.
Recalibrate moisture sensors if you’re using them. Seasonal changes affect soil moisture readings.
Annual Tasks
Replace vinyl tubing. UV exposure and mineral deposits degrade tubing over time. Fresh tubing makes sure you don’t get surprise failures.
Update your system design based on what you’ve learned. Maybe you added new plants that need a different watering schedule. Maybe some plants thrived with less water than you originally programmed.
Frequently Asked Questions
How long can I leave my self-watering system unattended?
With a 5-gallon reservoir and 10 plants, most systems run 10-14 days without refilling. A 10-gallon reservoir extends this to 20-30 days. The exact duration depends on plant size, climate, and season. Always test your system for at least two full cycles before relying on it for a long trip.
Can I use this system with fertilizer?
Yes, but with precautions. Liquid fertilizers diluted to half-strength work well in automatic systems. However, fertilizer accelerates mineral buildup in drippers and tubing. Clean your system more frequently (every 2-3 weeks) if using fertilizer. Never use granular fertilizers in automatic systems as they’ll clog everything.
What if my plants need different amounts of water?
That’s exactly what adjustable drippers solve. Each plant gets its own dripper that you can dial from slow drip to fast flow. Group similar plants together on the same watering schedule for easier management. Use separate zones for plants with very different needs.
Will this work for outdoor plants?
Absolutely. For outdoor use, you need a few modifications. Use UV-resistant black tubing instead of clear vinyl. Choose a pump rated for outdoor use (check for IP65 or IP66 waterproof rating). House your timer and electronics in a weatherproof box. Many gardeners run outdoor systems directly from a garden hose with a battery-powered timer.
My pump is noisy. How can I quiet it?
Most pump noise comes from vibration against the bucket. Place a piece of dense foam or a folded towel under the pump to dampen vibrations. Make sure the pump sits flat on the bucket bottom, not tilted. If noise persists, consider upgrading to a quieter pump (look for “ultra-quiet” or “silent” models, typically rated under 40 decibels).
Can I control my system remotely?
Yes, with a WiFi-enabled microcontroller like the ESP8266 or ESP32 (under $10). You can program it to connect to your home WiFi and send status updates or accept commands from a smartphone app. Several free apps work with Arduino-compatible boards. This lets you manually trigger watering from anywhere and receive alerts when the reservoir needs refilling.
How do I winterize my outdoor system?
Before first frost, drain all water from tubing, pump, and reservoir. Remove the pump and store it indoors. Leave tubing in place but blow compressed air through it to remove residual water that could freeze and crack the lines. Store timers and electronics indoors. In spring, reconnect everything and run a test cycle before the growing season begins.
What about power outages?
Battery-powered timers solve this problem. Most run on 2-4 AA batteries that last 6-12 months. For pump systems, you can add a rechargeable battery backup. A 12V rechargeable battery pack (like those used for camping lights) can run a 12V pump for several days if needed. Charge it from your wall adapter during normal operation, and it automatically takes over during outages.
Final Thoughts
Building your own self-watering system is easier than you think. Start with the basic timer system if you’re new to DIY projects. It costs under $30 and takes just 2-3 hours to set up. Your plants will thank you with healthier growth, and you’ll finally enjoy guilt-free vacations.
As you gain confidence, upgrade to moisture sensors or multi-zone control. These newer features give you better precision and flexibility, adapting to your plants’ changing needs throughout the seasons.
The hardest part is getting started. Once you see how well automation works, you’ll wonder why you ever watered by hand. Your plants will be healthier, your schedule will be easier, and you’ll have more time to actually enjoy your garden instead of being its servant.
Ready to get started? Pick your system type, order your materials, and follow this guide step by step. In just one weekend, you’ll have a fully automatic watering system that runs for months without attention. Your plants (and your vacation plans) will never be the same.