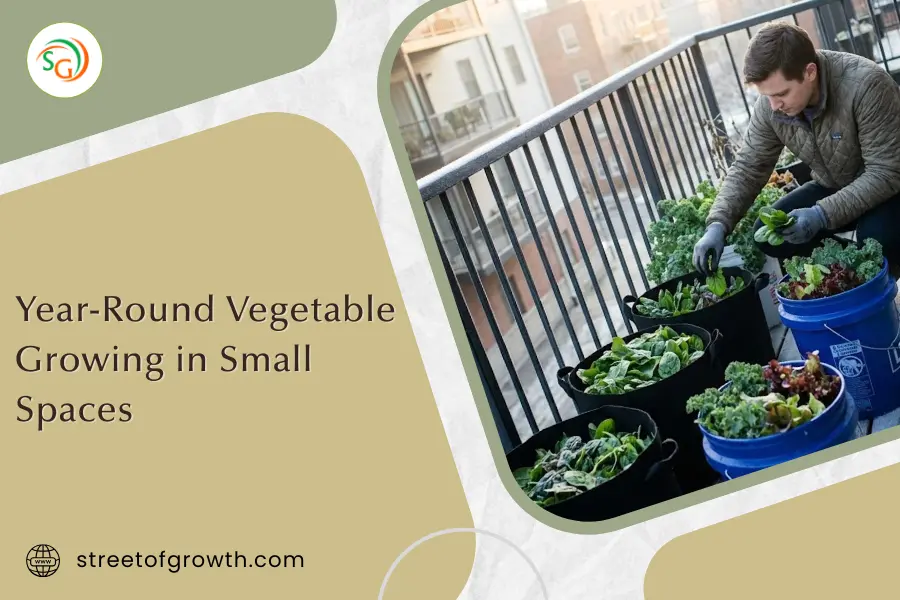
Year-Round Vegetable Growing in Small Spaces
You walk onto your tiny balcony on a freezing January morning. While your neighbors scrape ice off their car windows, you’re picking fresh spinach for breakfast. Three months later, those same neighbors are buying expensive tomatoes at the store while you’re harvesting cherry tomatoes from the same 20 square feet of space.
Sound impossible? It’s not.
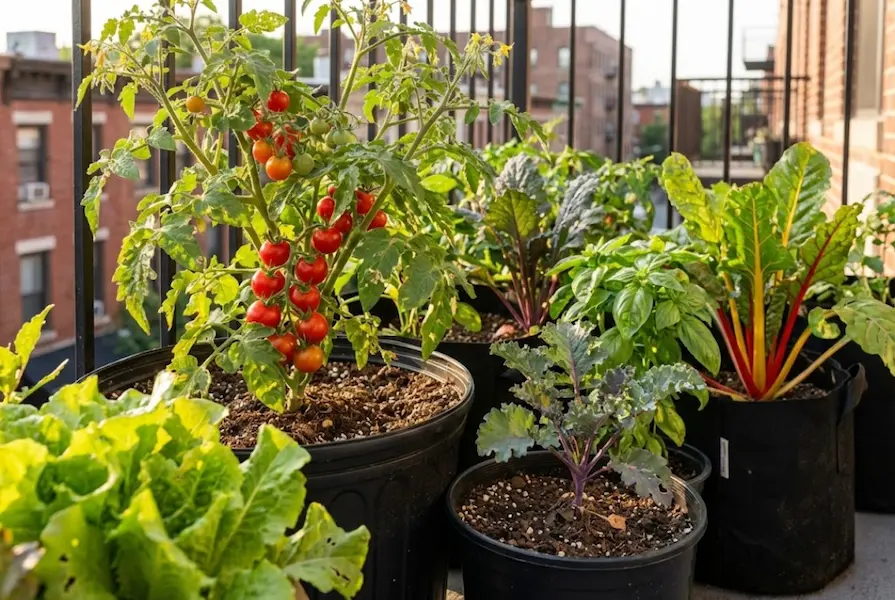
Growing vegetables year-round in small spaces is easier than most people think. You don’t need acres of land, a greenhouse, or even a backyard. With the right strategy, a 4×4 foot area can produce over 100 pounds of fresh vegetables annually.
This guide shows you exactly how to do it, no matter where you live or how small your space is.
Why Small Space Year-Round Growing Actually Works
Nobody tells you about vegetable gardening: bigger isn’t always better.
Small spaces offer surprising advantages:
Temperature control is easier. A few containers on a sunny balcony warm up faster in spring than a large garden bed. You can move pots to catch the best light or shield them from harsh weather.
Less maintenance means more consistency. Watering 10 containers takes five minutes. Weeding a massive garden plot takes hours. When gardening is quick, you actually do it every day.
Higher yields per square foot. Intensive planting methods work perfectly in small spaces. Professional market gardeners use these same techniques to grow thousands of dollars of vegetables on a quarter acre.
Year-round growing is simpler. Protecting 20 square feet from frost costs $30 in materials. Protecting 500 square feet costs hundreds.
The secret? Working with nature’s cycles instead of fighting them.
Planning Your Small Space: The Foundation
Before buying a single seed, spend 20 minutes planning. This step determines whether you’ll succeed or struggle.
Measuring Your Space
Walk outside with a tape measure. You need less space than you think:
4×4 feet (16 square feet): Perfect for beginners. Grows enough salad greens, herbs, and cherry tomatoes for one person year-round.
6×6 feet (36 square feet): Sweet spot for most people. Produces substantial harvests of 5-7 different vegetables throughout the year.
8×8 feet (64 square feet): Can feed a couple with daily salads, weekly harvests of cooking vegetables, and year-round herbs.
Not sure where to start? Choose your smallest viable option. You can always expand.
Sun Mapping (The 3-Day Test)
Grab your phone. Set alarms for 9am, noon, and 3pm for three consecutive days.
When each alarm rings, photograph your space. After three days, count the photos showing direct sunlight.
6+ photos with sun: Full sun. You can grow anything.
3-5 photos with sun: Partial sun. Focus on leafy greens, herbs, and cool-season crops.
0-2 photos with sun: Shade. Stick with lettuce, spinach, kale, and shade-tolerant herbs like mint and parsley.
Most balconies and patios get 4-6 hours of sun. That’s enough for year-round growing.
Choosing Your Growing System
You have three options:
Containers (Best for most people): 5-gallon buckets, fabric grow bags, or plastic pots. Costs $2-8 per container. Easy to move, replace, and rearrange.
Raised beds: Works if you have a dedicated patio or yard space. Costs $100-200 to build a 4×4 bed. Permanent but highly productive.
Vertical systems: Wall planters, hanging baskets, or tiered shelves. Costs $50-150 for a full system. Uses vertical space well but requires more attention to watering.
Most successful small-space gardeners use a combination. Start with containers. Add vertical growing as you gain experience.
The 12 Best Vegetables for Small Space Year-Round Growing
Forget what you’ve heard about needing dozens of plant varieties. These 12 vegetables produce heavily in small spaces and can be harvested across multiple seasons.
Leafy Greens (The Foundation)
1. Lettuce: Grows in 30-45 days. Plant new seeds every 2 weeks from March through October. Overwinter with simple protection. Takes up 6 inches of space per plant.
2. Spinach: Cold-hardy champion. Plant in early spring and late summer. Survives winter in most climates with basic frost protection. Harvest outer leaves continuously.
3. Kale: The ultimate small-space crop. One plant produces for 6+ months. Tolerates heat and cold. Grows well in partial shade. Takes 12 inches of space.
4. Swiss Chard: Colorful, productive, and nearly indestructible. Plant once in spring, harvest through fall. Regrows after cutting. Prettier than most flowers.
Compact Producers
5. Cherry Tomatoes (Dwarf Varieties): Look for “patio” or “container” types like ‘Tiny Tim’ or ‘Window Box Roma.’ Produce 50-100 tomatoes per plant. Need 5-gallon containers minimum.
6. Bush Beans: Produce for 3-4 weeks, then done. Plant new seeds every 3 weeks from last frost through mid-summer. Take up just 6 inches per plant.
7. Radishes: Ready in 25 days. Perfect gap-filler between other crops. Plant weekly for continuous harvest. Four plants fit in one square foot.
8. Bush Cucumbers: Varieties like ‘Bush Slicer’ or ‘Spacemaster’ stay compact. Produce 10-15 cucumbers per plant. Need 5-gallon containers.
Herbs (The Money Savers)
9. Basil: Warm-season herb that produces abundantly. Pinch regularly to prevent flowering. One plant provides fresh basil for months. Start new plants every 6 weeks.
10. Parsley: Biennial that survives mild winters. One plant produces for a full year. Grows well in partial shade.
11. Cilantro: Cool-season herb. Plant in spring and fall. Bolts quickly in heat but extremely productive while growing.
12. Chives: Perennial that returns every year. Survives winter outdoors. Multiply by division. One clump provides green onion flavor indefinitely.
Worth mentioning: Green onions (regrow from kitchen scraps), peppers (dwarf varieties), and microgreens (harvest in 7-10 days).
Your Month-by-Month Small Space Growing Calendar
This is exactly what to do each month. This timeline works for USDA zones 5-8 (most of the United States). Not sure what zone you’re in? Check the USDA Plant Hardiness Zone Map to find your exact zone. Adjust planting dates by 2-3 weeks if you’re in zones 4 or 9.
January-February: Planning and Prep
Indoor Tasks:
- Order seeds online (they sell out by March)
- Clean and organize containers from last year
- Start grow lights for indoor seedlings if you have them
- Begin hardening off indoor herbs by a sunny window
Outdoor Tasks:
- Check overwintered kale, spinach, and chard
- Add frost cloth on nights below 25°F
- Harvest any remaining winter greens
- Clean garden tools and sharpen pruners
What to Plant:
- Nothing outdoors yet
- Start seeds indoors 6-8 weeks before last frost: tomatoes, peppers, herbs (if you have grow lights)
March-April: Season Kickoff
The Action Begins:
Early March (or when soil reaches 40°F):
- Direct sow: lettuce, spinach, radishes, peas
- Transplant: kale, chard starts if you grew them indoors
Late March/Early April (2-3 weeks before last frost):
- Plant: more lettuce, arugula, cilantro
- Prepare containers: Fill with fresh potting mix
Don’t know your last frost date? Use the Old Farmer’s Almanac Frost Date Calculator to find the exact date for your ZIP code.
Key Tasks:
- Water when top 2 inches of soil are dry
- Watch weather for late frost warnings
- Thin seedlings to proper spacing
Expected Harvests: Overwintered greens, first radishes
May-June: Peak Spring Growing
Plant Everything:
After last frost date:
- Transplant: tomatoes, peppers, basil, cucumbers
- Direct sow: beans, more lettuce, summer squash
- Succession plant: radishes, lettuce every 2 weeks
Daily Routine:
- Morning check: water if needed
- Weekly: harvest lettuce, spinach, radishes
- Bi-weekly: fertilize containers with diluted liquid fertilizer
Expected Harvests: Lettuce, spinach, radishes, first herbs, peas, kale
July-August: Summer Production
Maintenance Mode:
- Stop planting lettuce (too hot, it bolts)
- Keep harvesting: tomatoes, cucumbers, beans, herbs
- Start seeds indoors for fall: kale, cabbage, broccoli (mid-July)
- Water daily in extreme heat
Problem Solving:
- Tomatoes dropping flowers? Too hot. They’ll recover.
- Lettuce bitter? Expected. Pull it and wait for fall planting.
- Basil flowering? Pinch off flowers to keep leaves coming.
Expected Harvests: Tomatoes, cucumbers, beans, peppers, herbs, chard
September-October: Fall Planting Window
Critical Month for Year-Round Growing:
Early September (8-10 weeks before first frost):
- Direct sow: lettuce, spinach, radishes, arugula, cilantro
- Transplant: fall kale, chard from July seedlings
- Plant: garlic cloves for next summer
Late September:
- Pull spent summer plants
- Succession plant more lettuce and spinach
Preparation:
- Acquire frost protection materials: row covers, plastic sheeting
- Test your watering system (fall rains might be inconsistent)
Expected Harvests: Late tomatoes, peppers, beans, summer greens finally sweet again
November-December: Winter Setup
Protecting Your Investment:
Before first frost:
- Cover tender greens with frost cloth or plastic
- Harvest remaining warm-season crops
- Mulch container plants with straw
After first frost:
- Keep harvesting cold-hardy greens
- Water on warm days (plants still need moisture)
- Remove any damaged leaves
What Survives:
- Kale (down to 20°F, sometimes lower)
- Spinach (under cover, to 15°F)
- Lettuce (with protection, to 25°F)
- Chard (to 22°F)
- Parsley (often survives to 10°F)
Expected Harvests: Kale, protected lettuce, chard, parsley, any remaining herbs before hard freeze
Space-Saving Techniques That Actually Work
You’ve seen the Pinterest photos of elaborate vertical gardens. Most are impractical. These techniques actually work in real life:
Vertical Growing (The Right Way)
Trellises: $15 of bamboo stakes and twine. Lean them against a wall at 60-degree angles. Perfect for cucumbers, beans, and peas. Saves 3-4 square feet per plant.
Hanging Baskets: Cherry tomatoes and strawberries love hanging. Use 3-gallon baskets minimum. Water twice daily in summer.
Stacking: Place smaller containers on upside-down 5-gallon buckets. Creates tiers. Ensure top plants don’t shade bottom plants.
Wall Pockets: Fabric pockets hung on a fence. Great for lettuce and herbs. Water runs through to lower pockets.
Succession Planting
The secret to continuous harvests: plant small amounts every 2 weeks.
Example Timeline:
- Week 1: Plant 4 lettuce plants
- Week 3: Plant 4 more
- Week 5: Harvest first lettuce, plant 4 more
- Week 7: Harvest second batch, plant 4 more
You’re always harvesting, never overwhelmed with too much at once.
Best crops for succession: Lettuce, radishes, beans, arugula, cilantro.
Interplanting
Plant fast-growing crops between slow-growing ones.
Example: Transplant a tomato seedling into a 5-gallon container. It won’t produce for 60 days. Meanwhile, plant radishes around the tomato. Harvest radishes in 25 days, before the tomato needs the space.
Other combinations:
- Lettuce around young peppers
- Radishes between kale plants
- Green onions anywhere with an inch of space
Container Selection Strategy
Minimum sizes that work:
- Lettuce, spinach, herbs: 1 gallon (6-inch deep)
- Radishes, green onions: 6 inches deep
- Chard, kale: 2-3 gallons (10 inches deep)
- Bush beans, dwarf peppers: 3 gallons
- Tomatoes, cucumbers: 5 gallons minimum (10 gallons better)
For more details on choosing the right container types and sizes, the University of Maryland Extension offers an excellent guide on container options for different vegetables.
Material matters:
- Plastic: Cheapest, retains moisture well, lasts 3-5 years
- Fabric grow bags: Excellent drainage, breathable, fold flat for storage
- Terracotta: Pretty but dries out fast. Double the watering.
Drainage is non-negotiable: Every container needs holes. No holes = dead plants.

Indoor-Outdoor Hybrid System: The Winter Solution
This is how you grow vegetables every month, even in harsh climates.
The Three-Zone Approach
Zone 1 (Outdoors, unprotected): Hardy greens like kale. Harvested with gloves in winter.
Zone 2 (Outdoors, protected): Lettuce, spinach, chard under row covers or in a cold frame. Extends season by 4-6 weeks on each end.
Zone 3 (Indoors): Herbs on a sunny windowsill or under grow lights. Microgreens in a kitchen tray.
Building a Simple Cold Frame ($20)
Materials:
- One old window or $10 of clear plastic sheeting
- Four 1×6 boards, 4 feet long
- Eight screws
Instructions:
- Build a 4×4 box with boards, higher in back (12 inches) than front (8 inches)
- Attach window or plastic on top with hinges (or just lean it)
- Place over existing containers or fill with soil
- Open on sunny days above 50°F to prevent overheating
This extends your growing season by 2 months in spring and fall. Total build time: 1 hour.
Indoor Herbs (No Grow Lights Required)
South-facing window with 4+ hours of direct sun works for:
- Basil
- Parsley
- Chives
- Thyme
- Oregano
Use 6-inch pots. Water when top inch of soil is dry. Rotate pots weekly so all sides get sun.
No sunny windows? Buy a $25 LED grow light. Run it 12 hours daily. Hang 6 inches above plants.
Microgreens: The 7-Day Crop
Fastest path to fresh greens in winter:
- Fill a shallow tray (1-2 inches deep) with potting mix
- Scatter seeds thickly across surface
- Cover with ¼ inch of soil
- Water gently, keep moist
- Harvest with scissors in 7-10 days when 2-3 inches tall
Best varieties: Radish, mustard, arugula, broccoli, kale.
One tray feeds two people salads for a week. Cost per tray: $0.50 in seeds and soil.
Cost Breakdown: What You’ll Actually Spend
Let’s be honest about money. Setting up a small-space year-round system costs this much:
First Year Setup (4×4 Space)
Containers:
- Ten 5-gallon buckets (drill drainage holes): $30
- Four grow bags: $20
- Subtotal: $50
Soil:
- Quality potting mix (2-3 cubic feet): $30
- Organic compost for top-dressing: $15
- Subtotal: $45
Seeds:
- 10 seed packets (enough for entire year): $30
- Or transplants from nursery: $40
Season Extension:
- Frost cloth (10×10 sheet): $15
- Materials for cold frame: $20
- Subtotal: $35
Tools and Supplies:
- Hand trowel, watering can: $15
- Liquid fertilizer: $10
- Subtotal: $25
Total First Year: $185-195
Ongoing Annual Costs
- Seeds: $20-30
- Potting mix refresh: $15
- Fertilizer: $10
- Total: $45-55 per year
Return on investment: 100 pounds of vegetables annually. At $3/pound grocery store price, that’s $300 worth of produce. Pay off your setup in 8 months.
Plus, homegrown lettuce tastes 10 times better than store-bought. You can’t put a price on that.
Common Mistakes (And How to Avoid Them)
Mistake 1: Planting Too Much, Too Soon
The Problem: You plant 20 lettuce plants in April. They’re all ready at once. You eat salad for a week, then half rots.
The Fix: Plant 4-5 at a time. Two weeks later, plant 4-5 more. Stagger your harvest.
Mistake 2: Wrong Container Size
The Problem: Tomatoes in 1-gallon pots never produce fruit. Roots are cramped.
The Fix: Match plant to pot size. Use the minimum sizes listed earlier in this guide. When in doubt, go bigger.
Mistake 3: Ignoring Fall Planting
The Problem: Summer ends, you pull everything, no harvest until next May.
The Fix: August-September is a second “spring.” Plant cool-season crops then. They grow through fall and winter with protection.
Mistake 4: Overhead Watering
The Problem: Spraying plants from above promotes fungal disease. Wastes water.
The Fix: Water soil, not leaves. Use a watering wand or drip system. Morning watering is best.
Mistake 5: Giving Up After First Frost
The Problem: First frost hits. You think growing season is over.
The Fix: First frost kills tomatoes and basil. Kale, lettuce, and spinach laugh at first frost. Cover them and keep harvesting for months.
Troubleshooting Guide
Plants are yellowing:
- Too much water: Let soil dry out
- Not enough nutrients: Feed with liquid fertilizer
- Container too small: Transplant to bigger pot
Nothing is germinating:
- Soil too cold: Wait for warmer weather or start indoors
- Planted too deep: Most seeds need only ¼ inch of soil
- Soil dried out: Keep consistently moist until germination
Lettuce is bitter:
- Temperature above 75°F: Expected. Pull it and wait for fall
- Planted wrong time: Lettuce is spring/fall crop, not summer
Tomatoes have flowers but no fruit:
- Temperature above 90°F or below 55°F: Wait for better weather
- Not enough light: Move to sunnier location
- Need pollination: Gently shake plants when flowering
Plants are leggy and pale:
- Not enough light: Move to sunnier spot or add grow light
- Too much nitrogen: Reduce fertilizer, increase light
Frequently Asked Questions
How much time does this actually take?
Daily: 5-10 minutes for watering and quick harvest Weekly: 20-30 minutes for planting, weeding, and detailed inspection Monthly: 1 hour for major plantings or season transitions
Most of your time is in spring and fall during planting seasons. Summer and winter are mainly watering and harvesting.
Can I really grow vegetables on an apartment balcony?
Yes, if you have 4+ hours of sun. Focus on lettuce, herbs, cherry tomatoes, and peppers. Use containers and grow bags. Thousands of people do this successfully.
What if I live in a very hot or very cold climate?
Hot climates (zones 9-10): Reverse the calendar. Your “spring” is October-March. Summer growing focuses on heat-tolerant crops like okra and Armenian cucumber.
Cold climates (zones 3-4): Shorter outdoor season but more dramatic cold-hardy crops. Invest in a cold frame. Embrace indoor growing in winter.
Do I need expensive equipment?
No. Start with containers, soil, and seeds. The rest is optional. You can build cold frames from scrap materials. Many successful gardeners spend under $100 the first year.
What’s the single most important thing for success?
Consistency. Check your garden daily, even if just for 2 minutes. Water when needed. Harvest regularly. The gardens that fail are the ones that get ignored for weeks at a time.
Can I grow root vegetables like carrots in containers?
Yes, but choose shorter varieties marketed as “container” or “round” carrots. They need 10-12 inches of soil depth. Beets work even better in containers.
How do I deal with pests in a small space?
Small spaces have fewer pest problems than large gardens. Hand-pick any bugs you see. Use floating row covers to exclude pests. Spray insecticidal soap for aphids. Most container gardens have minimal pest issues.
Your Action Plan: Starting This Week
You’ve read the entire guide. Now do this in the next 7 days:
Day 1-2: Measure your space. Complete the sun mapping test. Decide on containers or raised beds.
Day 3-4: Order seeds online or visit a local nursery. Buy containers, potting mix, and basic tools if you don’t have them.
Day 5: Set up your containers. Fill with potting mix. Arrange them in your space.
Day 6: Plant your first seeds or transplants based on current season. Start with lettuce and herbs (they’re nearly foolproof).
Day 7: Water your new plantings. Take a photo. You’ve officially started.
The first tomato you harvest will taste better than any you’ve bought. The first salad made entirely from your balcony will feel like magic.
But what really happens: three months from now, you’ll walk outside and realize you haven’t bought lettuce in weeks. Six months from now, your neighbors will ask how you’re picking fresh vegetables in December.
That’s when you’ll know it worked.
The best part? You don’t need to wait for perfect weather, more space, or more time. You can start with what you have, right now.
Year-round vegetable growing in small spaces isn’t about having the perfect setup. It’s about taking the first step, learning as you grow, and enjoying fresh food every single month.
Your tiny garden is waiting. Go start it.