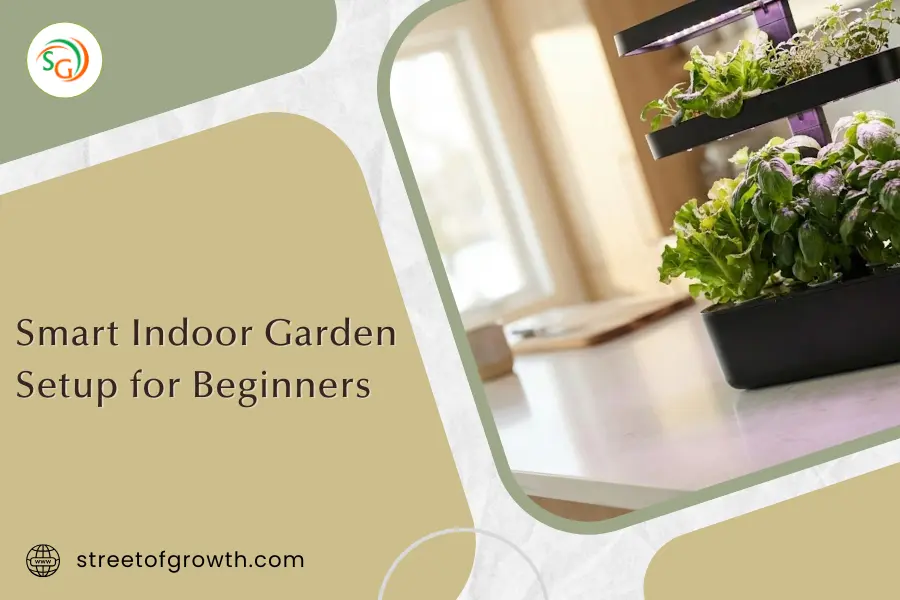
Smart Indoor Garden Setup for Beginners
Imagine walking into your kitchen and picking fresh basil for tonight’s pasta or grabbing crisp lettuce for your lunch salad. No grocery store trip needed. No wondering what chemicals are on your food. Just pure, organic greens growing right in your home.
That’s the magic of smart indoor gardens, and 2026 is the perfect year to start. These amazing systems have become easier, smarter, and more affordable than ever. Whether you live in a tiny studio apartment or have never grown a single plant in your life, you can have a thriving indoor garden in just a few days.
This guide will walk you through setting up your first smart indoor garden. We’ll keep things simple and straightforward so you can start growing your own food with confidence.
What Is a Smart Indoor Garden?
A smart indoor garden is a self-contained growing system that takes care of almost all the work for you. Think of it like a high-tech planter that knows exactly what your plants need.
What makes these gardens “smart”:
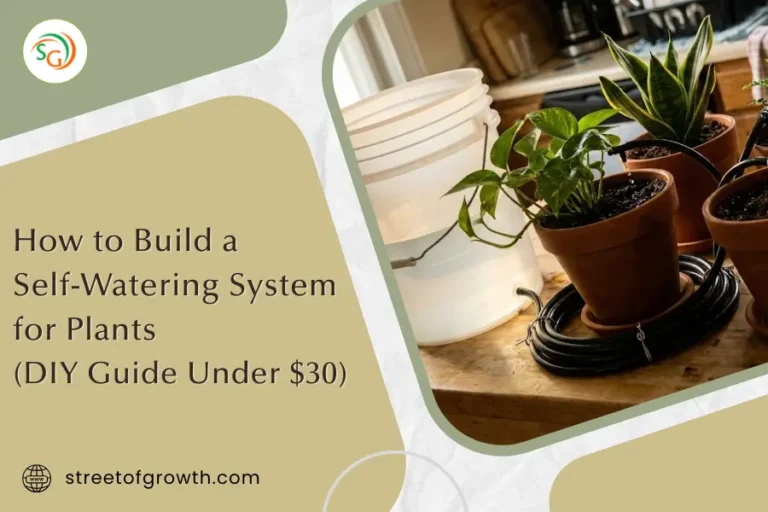
Self-Watering System: The system waters your plants at the perfect time. No more dead plants from forgetting to water.
Grow Lights Included: LED lights give your plants the exact type of light they need to grow, even in a dark corner of your home.
Nutrient Delivery: The system adds plant food on its own, so your vegetables and herbs get what they need.
App Control: Many 2026 models connect to your phone. You can check on your garden from anywhere and get alerts when it needs water.
AI Features: The newest systems use artificial intelligence to learn what your plants need and adjust on their own.
Unlike traditional gardening, you don’t need soil, outdoor space, or even a green thumb. The technology does the hard work while you enjoy the results. In fact, the hydroponic methods used in these systems were pioneered by NASA for growing food in space, making them incredibly reliable and efficient.
Why Start a Smart Indoor Garden in 2026?
The smart indoor garden market has exploded in 2026, and for good reason. Now is the best time to start:
Better Technology at Lower Prices: Competition has driven prices down while features have improved. You can now get systems with AI, app connectivity, and sensors for much less than a few years ago.
Food Quality Concerns: With ongoing recalls and questions about pesticide use on store-bought produce, growing your own food gives you complete control over what you eat.
Space-Saving Designs: 2026 models are designed specifically for apartments and small homes. Vertical gardens and wall-mounted options make it possible to grow 20+ plants in just a few square feet.
Energy Efficiency: New LED technology uses very little electricity. Most systems cost less than $5 per month to run.
Sustainability Focus: Many brands now use biodegradable seed pods and recyclable materials, making indoor gardening more eco-friendly than ever.
Types of Smart Indoor Gardens (2026 Edition)
Before setting up your garden, you need to choose the right type for your space and lifestyle. The main categories:
Countertop Gardens
Best for: Beginners, small kitchens, growing herbs
Size: 3-12 plant capacity
Price Range: $80-$300
These compact systems sit on your kitchen counter like a coffee maker. They’re perfect for growing herbs like basil, mint, and parsley. Most models are plug-and-play, meaning you just add water and plant pods.
Popular 2026 Models: Click & Grow Smart Garden 9, AeroGarden Harvest, LetPot Mini
Vertical Gardens
Best for: Serious growers, small apartments, growing vegetables
Size: 20-30+ plant capacity
Price Range: $400-$800
These tall, slim systems use vertical space well. They’re ideal if you want to grow salad greens, cherry tomatoes, and peppers. Many use hydroponic or aeroponic technology for faster growth.
Popular 2026 Models: Gardyn Home 4.0, Rise Gardens Personal, Lettuce Grow Farmstand Nook
Wall-Mounted Gardens
Best for: Decorative growing, space-constrained homes
Size: 6-15 plant capacity
Price Range: $150-$400
These mount on your wall like artwork. They’re beautiful to look at and save floor space. Great for herbs, small flowers, and microgreens.
Popular 2026 Models: Plantaform Indoor Garden, Custom modular systems
DIY Smart Gardens
Best for: Budget-conscious beginners, customization lovers
Size: Varies
Price Range: $50-$150
You can build your own smart garden using basic components (grow lights, containers, timer). This option takes more effort but costs less.
Choosing Your First Smart Indoor Garden: Quick Decision Guide
Still not sure which type to get? Answer these questions:
Question 1: What do you want to grow?
- Just herbs for cooking → Countertop garden
- Salads and vegetables → Vertical garden
- Variety of plants → Vertical or wall-mounted garden
Question 2: How much space do you have?
- Very limited (studio apartment) → Wall-mounted or small countertop
- Standard kitchen counter space → Countertop garden
- Floor space available → Vertical garden
Question 3: What’s your budget?
- Under $150 → DIY or basic countertop
- $150-$400 → Mid-range countertop or wall-mounted
- $400+ → Premium vertical garden
Question 4: How tech-savvy are you?
- Love smart home tech → Models with app control and AI
- Prefer simple → Basic plug-and-play countertop models
Setup Instructions: Step-by-Step
Now let’s get your smart indoor garden up and running. This process works for most systems, but always check your specific model’s instructions.
Step 1: Choose the Perfect Location
Your garden’s location matters more than you might think. What to look for:
Near a Power Outlet: Most systems need to stay plugged in continuously.
Away from Heat Sources: Don’t place near ovens, radiators, or heating vents. High heat can damage plants and the system.
Stable Surface: Make sure your counter or floor can support the weight when the water tank is full.
Convenient Access: Put it somewhere you’ll see it daily. Out of sight often means forgotten plants.
Away from Curious Pets: If you have cats or dogs, choose a spot they can’t reach.
Consider the View: Many 2026 gardens are beautiful. Put yours where guests can see it.
Step 2: Unbox and Inspect
When your garden arrives:
- Check all parts against the instruction manual
- Look for any shipping damage
- Register your product for warranty
- Download the companion app if your model has one
- Charge any rechargeable components
Step 3: Assemble the System
Most 2026 models require minimal assembly:
- Attach the grow lights to the main unit (usually just snapping into place)
- Install any extensions if your model has height adjustments
- Insert the water reservoir or attach the water tank
- Place the growing tray where plant pods will go
- Plug in the system and make sure lights turn on
This usually takes 10-15 minutes. If something doesn’t fit easily, don’t force it. Check the manual or watch the setup video.
Step 4: Add Water and Nutrients
- Fill the water reservoir to the indicated line (usually marked clearly)
- Add the included plant nutrients according to package directions
- Some systems have nutrient reservoirs that you fill separately
- Use filtered or tap water (let tap water sit overnight if it’s heavily chlorinated)
Pro Tip: Add a calendar reminder to check water levels weekly. Most systems last 2-4 weeks between refills.
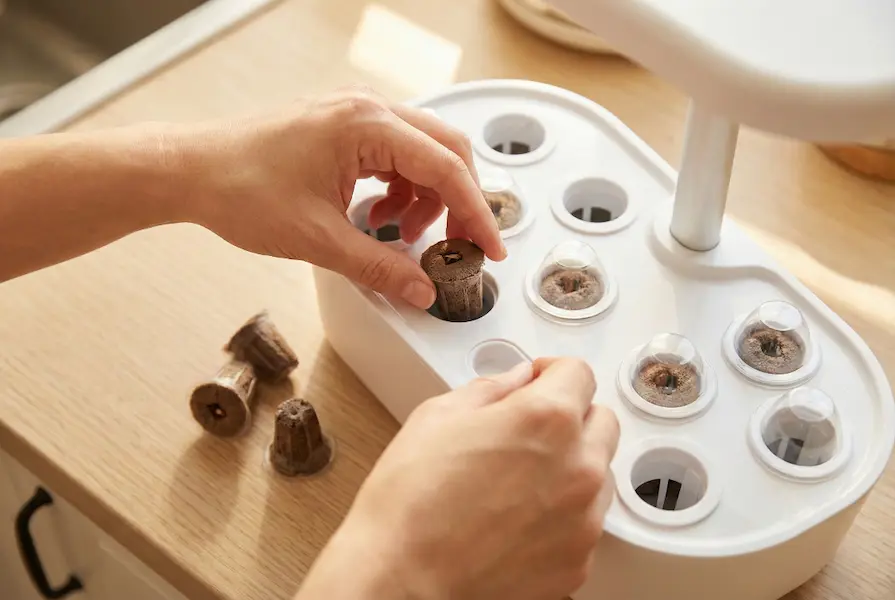
Step 5: Insert Plant Pods or Seeds
This is the fun part!
If using pre-seeded pods:
- Remove pods from packaging
- Remove any covering or seal
- Place in the growing holes
- Add the dome covers (these create a mini greenhouse)
- Pods will germinate in 7-14 days
If using your own seeds:
- Fill growing cups with the provided growing medium
- Plant 2-3 seeds per cup
- Cover lightly with more medium
- Add dome covers
- Label each cup so you remember what you planted
Step 6: Configure Settings
For Basic Systems:
- The lights should turn on by themselves
- Check that the timer is set correctly (usually 16 hours on, 8 hours off)
- Adjust light height if possible (should be 2-3 inches above where plants will grow)
For Smart Systems with Apps:
- Connect to your home Wi-Fi
- Create an account in the app
- Select your plant types
- Enable notifications for water and nutrient reminders
- Set your preferred light schedule (or let AI handle it)
Step 7: First Week Care
During the first week:
- Check water level daily (plants are establishing)
- Keep dome covers on until you see sprouts
- Make sure lights are turning on and off correctly
- Watch for any leaks around the water reservoir
- Resist the urge to mess with seeds (they need time)
What to Grow First: Beginner-Friendly Plants
Starting with easy plants builds your confidence. The best choices for absolute beginners:
Herbs (Easiest Category)
Basil: Grows super fast, needs regular trimming, great for cooking. You’ll see growth in about 2 weeks.
Mint: Nearly impossible to kill, grows like crazy, perfect for tea and mojitos.
Parsley: Slower to start but very reliable, grows well with other herbs.
Chives: Super low-maintenance, keep coming back after cutting, mild onion flavor.
Salad Greens (Very Easy)
Lettuce: Ready to harvest in 3-4 weeks, constant production, mild flavor.
Arugula: Peppery taste, fast grower, perfect for salads and sandwiches.
Spinach: Nutrient-packed, steady grower, great raw or cooked.
Vegetables (Moderate Difficulty)
Cherry Tomatoes: Take longer (8-12 weeks) but very rewarding. Need good light.
Peppers: Compact varieties work well, take 10-14 weeks, fun to watch grow.
Strawberries: Some 2026 systems support these, take 12+ weeks but so worth it.
What to Avoid at First
- Large vegetables (regular tomatoes, eggplant)
- Root vegetables (carrots, potatoes)
- Plants requiring hand-pollination unless you’re ready for that
- Exotic or rare varieties (save these for when you have experience)
Daily, Weekly, and Monthly Maintenance
Smart gardens are low-maintenance, but they’re not zero-maintenance. Your care schedule:
Daily Tasks (2 minutes)
- Quick visual check (are plants growing? Any issues?)
- That’s it! Really.
Weekly Tasks (5-10 minutes)
- Check water level, refill if needed
- Prune any dead leaves
- Harvest mature plants
- Check for pests (rare indoors but possible)
- Wipe down lights if dusty
Bi-Weekly Tasks (10 minutes)
- Add nutrients according to your system’s schedule
- Clean water reservoir if your system requires it
- Adjust light height as plants grow
- Remove and replace any failed plants
Monthly Tasks (15-20 minutes)
- Thorough cleaning of the system (follow manufacturer instructions)
- Replace filters if your model has them
- Inspect grow lights for any burnt-out LEDs
- Check all connections and cords
- Update app if software updates are available
2026 Smart Features You Should Actually Use
Modern smart gardens come packed with features. What actually matters:
Must-Have Features
Timer for Lights: Essential. Ensures plants get consistent light daily.
Water Level Indicators: Saves you from the guesswork. Some systems even send phone alerts.
Height Adjustment for Lights: Critical as plants grow taller. Make sure you can raise lights easily.
Really Useful Features
App Connectivity: Helpful for beginners. The app sends reminders and growing tips.
Growth Tracking: Some apps let you log harvests and track plant progress. Great for learning.
Pre-set Plant Profiles: System adjusts settings based on what you’re growing. Less thinking for you.
Nice-to-Have Features
AI Learning: Latest 2026 feature. System learns and adjusts on its own. Cool but not essential.
Voice Control: If you have Alexa or Google Home, you can check status by voice. Convenient but not critical.
Camera Monitoring: See your plants remotely. Fun but not necessary.
Marketing Hype (Skip These)
Bluetooth Instead of Wi-Fi: Limited range, not as useful as Wi-Fi.
Too Many Sensors: Some systems overdo it. You don’t need 10 different sensors for a small herb garden.
Subscription Requirements: Some brands lock features behind subscriptions. Choose systems with free core features.
Common Beginner Problems (and Easy Fixes)
Everyone makes mistakes. The most common issues and how to solve them:
Problem: Seeds Won’t Germinate
Possible Causes:
- Old or bad seed pods
- Temperature too cold (below 60°F)
- Not enough moisture in dome
Solutions:
- Try fresh pods from a different batch
- Move garden to warmer location
- Check that dome is properly seated
- Wait longer (some seeds take 3 weeks)
Problem: Plants Growing Too Slowly
Possible Causes:
- Not enough light
- Water level too low
- Nutrient deficiency
- Wrong plant for the season
Solutions:
- Lower lights closer to plants
- Refill water reservoir
- Add nutrients on schedule
- Some plants naturally grow slower in winter
Problem: Yellow or Brown Leaves
Possible Causes:
- Nutrient burn (too much food)
- Not enough water reaching roots
- Natural aging of lower leaves
- pH imbalance
Solutions:
- Dilute nutrient solution slightly
- Check that roots are touching water
- Remove old leaves (normal)
- Test pH if your system includes strips
Problem: Tall, Leggy Plants
Possible Causes:
- Lights are too far away
- Not enough light intensity
- Plants stretching toward window light
Solutions:
- Lower lights to 2-3 inches above plants
- Increase daily light duration to 18 hours
- Keep garden away from windows (confuses plants)
Problem: Algae Growing in Water
Possible Causes:
- Light reaching water reservoir
- Water sitting too long without changes
Solutions:
- Cover any clear parts of reservoir with dark tape
- Clean reservoir monthly
- Change water every 2-3 weeks
- Add hydrogen peroxide (1 tsp per gallon)
Problem: Pests Appearing
Possible Causes:
- Brought in on clothing or pets
- Contaminated soil or seeds
- Open windows nearby
Solutions:
- Inspect plants weekly
- Remove affected leaves immediately
- Use neem oil spray (organic and safe)
- Keep garden away from open windows
- Most smart gardens have few pest issues since they’re hydroponic
Cost Breakdown: What You’ll Really Spend
Let’s be honest about costs. What to expect:
Initial Investment
| Item | Budget Range | Mid-Range | Premium |
|---|---|---|---|
| Smart Garden System | $80-$150 | $200-$400 | $500-$800 |
| Initial Plant Pods/Seeds | Included | Included | Included |
| Extra Plant Varieties | $15-$25 | $15-$25 | $15-$25 |
| Total First Purchase | $95-$175 | $215-$425 | $515-$825 |
Ongoing Monthly Costs
| Expense | Cost |
|---|---|
| Electricity (LED lights) | $3-$5 |
| Plant Pods/Seeds | $10-$20 |
| Nutrients | $5-$10 |
| Water | Under $1 |
| Monthly Total | $18-$36 |
Annual Cost
After your first year, expect to spend around $200-$400 total on maintenance and new plants. Compare this to buying organic herbs at the store ($3-$5 per package, weekly), and the system pays for itself in 6-12 months.
Space Planning Guide
One question beginners always ask: “Where should I put my garden?” A room-by-room guide:
Kitchen (Most Popular)
Pros: Convenient for cooking, easy to remember to care for, adds life to the space
Cons: Heat from cooking, grease splatters, limited counter space
Best Location: Corner of counter away from stove, on a kitchen island, or on open shelving
Living Room
Pros: Becomes a conversation piece, plenty of space, good temperature control
Cons: May look out of place, further from kitchen use
Best Location: Near a window (but not needed), on a plant stand, as part of a home office setup
Dining Room
Pros: Great for showing off, herbs right where you eat, often underused space
Cons: May only see it during meals
Best Location: Sideboard or buffet table, corner unit, floating shelf
Bedroom
Pros: Plants improve air quality while you sleep, peaceful to watch grow
Cons: Light cycle might disturb sleep
Best Location: Dresser or side table (set lights to turn off at bedtime)
Home Office
Pros: Watching plants grow reduces stress during work, productive break activity
Cons: Can be distracting in video calls
Best Location: Behind you on a credenza, side desk space, bookshelf
Bathroom
Pros: High humidity helps some plants, unique conversation starter
Cons: Limited space, potential water damage concerns
Best Location: Spacious bathrooms only, away from direct shower spray
Making the Most of Your Harvest
Once your plants start producing, you’ll want to harvest correctly:
When to Harvest
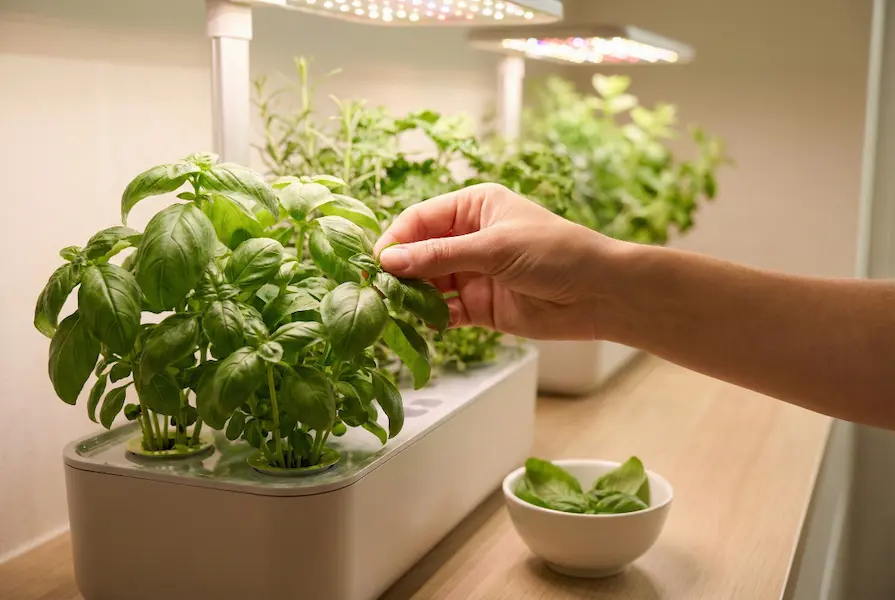
Herbs: Pick leaves when plants are 4-6 inches tall. Take no more than 1/3 of the plant at once.
Lettuce: Begin harvesting outer leaves when they’re large enough to use. Plant will keep producing.
Spinach: Pick outer leaves first, leaving the center to continue growing.
Tomatoes: Wait until fully colored and slightly soft. They won’t ripen more after picking.
Harvesting Tips
- Use clean scissors or pinch with your fingers
- Harvest in the morning for best flavor
- Regular harvesting encourages more growth
- Never take more than 1/3 of the plant unless you’re removing it completely
- Wash harvested produce even though it’s pesticide-free
Using Your Harvest
Fresh herbs are much stronger than dried. Use about 1/3 the amount that recipes call for when they specify dried herbs.
Store extra harvest:
- Herbs: Freeze in ice cube trays with olive oil
- Lettuce: Wash, dry thoroughly, store in fridge in paper towels
- Basil: Make pesto and freeze in small containers
- Tomatoes: Enjoy immediately (they lose flavor in the fridge)
Taking Your Growing Skills Further
After your first successful harvest, try these intermediate techniques:
Companion Growing
Some plants grow better together. Try these combinations:
- Basil + tomatoes (basil repels tomato pests)
- Lettuce + spinach (same growing needs)
- Mint on its own (it dominates other plants)
Seed Starting for Outdoors
Use your smart garden as a seed starter for an outdoor garden. Start seeds indoors, then transplant outside when weather permits.
Experimenting with Rare Varieties
Once you’re comfortable, try exotic herbs like Thai basil, lemon balm, or edible flowers like nasturtiums.
Pruning for Better Yields
Learn pruning techniques to keep herbs bushy and productive rather than tall and leggy.
pH Testing and Adjustment
Most smart gardens handle this, but testing and adjusting pH can help growth for specific plants.
Troubleshooting Tech Issues
Sometimes the technology gives you trouble. How to fix common tech problems:
App Won’t Connect
- Ensure garden is plugged in and powered on
- Check that your phone and garden are on same Wi-Fi network
- Restart both your phone and the garden
- Uninstall and reinstall the app
- Check for firmware updates in the app settings
Lights Won’t Turn On
- Check power connection
- Inspect cord for damage
- Test outlet with another device
- Try plugging directly into wall (not power strip)
- Contact manufacturer if lights are burnt out
Water Pump Not Working
- Make sure water level is above minimum line
- Check for blockages in pump intake
- Clean pump filter if your system has one
- Listen for pump noise (it should be quiet humming)
System Reset Needed
Most systems have a reset button. Hold for 10 seconds to restore factory settings. You’ll need to set up again.
Sustainability and Your Smart Garden
2026 models are more eco-friendly than ever. How to be even more sustainable:
Water Conservation
Smart gardens use 90-95% less water than traditional gardens because water recirculates. To conserve even more:
- Only refill when needed
- Use collected rainwater if safe
- Don’t overfill reservoir
Energy Efficiency
LED grow lights use minimal power (5-20 watts). Reduce usage further:
- Use timer to match actual plant needs
- Choose energy-star rated models
- Unplug when away for extended periods
Reducing Waste
- Choose brands with biodegradable pods
- Reuse growing cups if possible
- Compost old plants and roots
- Recycle packaging materials
- Buy refillable nutrient concentrates
Supporting Sustainable Brands
Look for companies that:
- Use recycled plastics in construction
- Offer pod recycling programs
- Source seeds organically
- Have carbon-neutral shipping
- Donate to environmental causes
Frequently Asked Questions
How long do smart gardens last?
Quality systems last 3-5 years with proper care. Lights may need replacing after 2-3 years of heavy use. The pump and electronics typically last longer.
Can I use my own seeds instead of buying pods?
Yes! Most systems include reusable growing cups. You’ll need to add your own growing medium (like rockwool or coco coir) and seeds. This saves money long-term.
Do I need a sunny window?
No! That’s the beauty of smart gardens. The grow lights provide what plants need. In fact, placing near windows can confuse plants and cause uneven growth.
What if I go on vacation?
Most systems hold enough water for 2-4 weeks. Before leaving, fill the reservoir completely, harvest ready plants, and your garden will be fine. Some 2026 models send alerts to friends or family if water gets low.
Are smart gardens noisy?
Very quiet. Water pumps make a gentle humming that most people don’t notice. They’re much quieter than a refrigerator or computer fan.
Can I grow regular vegetables like carrots or potatoes?
Not in most smart gardens. Root vegetables need soil with depth. Stick to leafy greens, herbs, and plants that grow above ground. Some larger systems support cherry tomatoes and peppers.
Is the food really organic?
If you use organic seeds and nutrients, yes. The hydroponic growing method itself is pesticide-free since pests are rare indoors. However, “organic” certification requires soil, so technically hydroponic produce can’t be certified organic even though it’s grown organically.
Do smart gardens attract bugs?
Rarely. Since there’s no soil and systems are indoors, pest problems are minimal. The occasional gnat or aphid might appear but they’re easy to handle with organic sprays.
Can kids help with the garden?
Absolutely! Smart gardens are perfect for teaching kids about where food comes from. They can help plant seeds, water, harvest, and eat the results. Great science project too.
What happens if the power goes out?
Plants can survive 24-48 hours without light if it’s temporary. The water stays in the reservoir, so they won’t dry out. If outages are common in your area, look for systems with battery backup for the pump.
Can I grow flowers?
Yes! Many systems support edible flowers like nasturtiums, pansies, and violas. Some also work for small decorative flowers. Check your system’s plant compatibility list.
How do I know when to harvest?
The app usually tells you, or you can simply watch plant size. Herbs are ready when 4-6 inches tall. Lettuce when leaves are large enough to use. Tomatoes when fully colored. If unsure, wait longer rather than harvest too early.
Can I move the garden once it’s set up?
Yes, but drain most of the water first to reduce weight and prevent spills. Some larger systems are heavy (30-50 pounds full) so get help if needed.
Do I need to clean it regularly?
Monthly thorough cleaning keeps algae away and systems running smoothly. It takes about 15 minutes. Empty the reservoir, wipe down with vinegar solution, rinse well, and refill.
Will this work in a cold room?
Most plants prefer 65-75°F. Below 60°F, growth slows significantly. If your room is cold, choose a warmer location or consider a small space heater nearby (not too close to the garden).
Final Tips for Success
Before we wrap up, the most important lessons from experienced smart gardeners:
Start Small: Don’t fill every pod in your first garden. Start with 3-5 plants and learn the basics.
Be Patient: Seeds take time. Don’t panic if nothing happens for 7-10 days. That’s normal.
Check Daily: Make it a habit. Morning coffee and plant check go together perfectly.
Read the Manual: Seriously. Each system is slightly different. Know your specific model.
Join the Community: Most brands have Facebook groups or forums. Real users share great tips.
Take Notes: Track what grows well for you. Plant journaling helps you improve.
Enjoy the Process: Growing food is supposed to be fun and relaxing. Don’t stress over every leaf.
Harvest Regularly: The more you harvest (correctly), the more plants produce. Don’t wait for the “perfect” time.
Start Growing Today
You now have what you need to start your smart indoor garden. The hardest part is already done (learning what to do). Now comes the fun part: watching your first seeds sprout, tasting your first home-grown basil, and sharing fresh salads with friends.
2026 technology has made indoor gardening easier than ever. The systems are smarter, more affordable, and more reliable. There’s never been a better time to start.
Choose a system that fits your space and budget. Start with easy plants like herbs and lettuce. Follow the setup steps. Check your garden daily. Before you know it, you’ll be harvesting fresh, organic produce from your own home.
Going from beginner to confident indoor gardener takes just a few weeks. Your first successful harvest will make it all click. Soon you’ll be helping other beginners and trying new plants.
Welcome to the world of smart indoor gardening. Your fresh, home-grown food is just a few weeks away.
Happy growing!